What you need
Tool
 Side cutter
 Pointed pliers
 Soldering iron + solder
 Soldering pliers
Parts
- Teensy developer board
- Audio shield
- 2-core cable (4cm)
- 40-pin header
- Battery socket
- Battery pack (only for checking the correct polarity when soldering)
How it works
Shorten the pin header
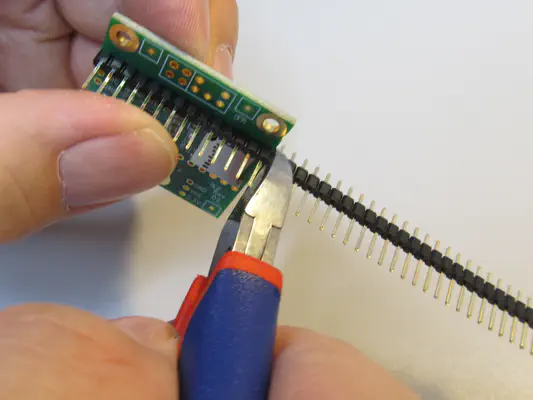
Shorten the pin header to the length of the audio shield
The 40-pin strip is too long for the audio shield. Simply insert it flush on one side onto the row of holes in the audio shield and cut off the excess with the side cutter.
Do the same for the opposite side. You should now have two strips of the same length (14 pins) and a shorter remaining piece.
The remaining piece is no longer needed. It is best to put it aside so that you don’t use it by mistake.
Solder the pin headers
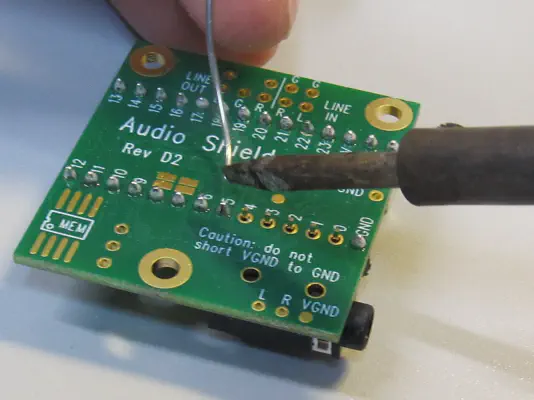
The short ends of the shortened pin headers are soldered to the audio shield.
Now insert your two pin headers of the same length into the audio shield with the short side from above (side with jack connection and Micor SD card slot) and solder the headers to the back of the audio shield pin by pin.
Set up Teensy and customize pins
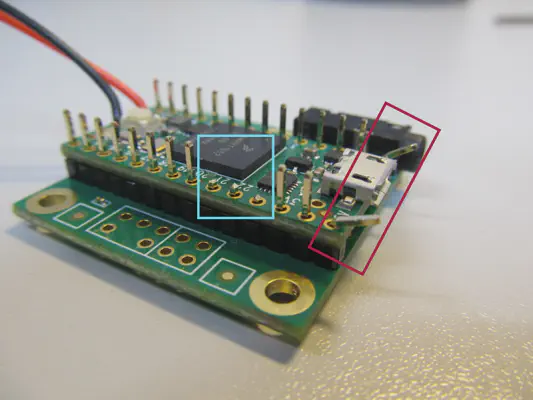
Clip off the pins (cyan) or bend them (red).
- Now place the Teensy on the long pins. The USB socket points upwards and in the same direction as the audio shield's jack connection. Use needle-nose pliers (
-
In order to be able to solder the voltage transformer properly later on, use the side cutter () to cut off pins 21, 22, 23.
- Now solder all the pins to connect the two boards.
Prepare the socket for the power supply
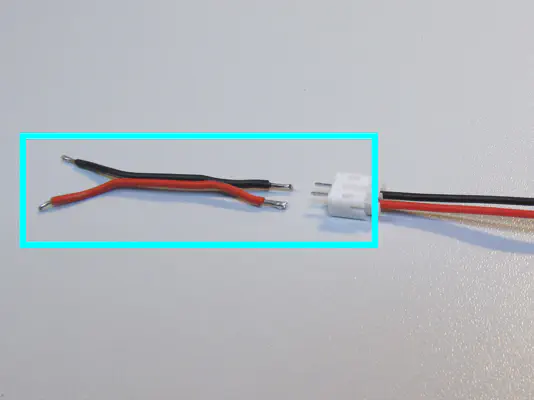
Solder the socket cable together
- In the picture you can see the two-core cable (4 cm) framed in cyan and the connection socket. The connection socket still contains a plug (with cable) that was included in the scope of delivery. This can be a help when soldering. However, you will no longer need the plug and cable in the following steps.
- Cut the two-core cable (4 cm) a little on both sides and strip all ends. (Already done in the photo)
- Now solder the cable to the socket so that the polarity matches the plug of the battery pack.
Solder the socket with strain relief

Solder the socket cable together
- Now route the cable of the button cell holder (already soldered to the Teensy) over the Teensy in the direction of the USB socket. Then feed the black cable of the battery pack socket from the previous step (coming from the button cell) through the shrink tubing.
- Solder the black cable to the bent GND pin and the red cable to the likewise bent 5V pin.
- In order to relieve the soldering points for the cables of the button cell holder against tension, all cables are "fixed" in the shrink tubing by heating them. To do this, push the cables of the button cell holder back slightly in the direction of their soldering points so that there is no longer any tension on these cables. Now carefully heat the shrink tubing with a heat gun or lighter.