Teensy developer board
What you need
Tool
 Cutter knife
 Soldering iron + solder
- Micro USB cable + 5V power supply/USB port of the laptop
Parts
- Teensy developer board
- Button cell holder
- Shrink tubing (1cm)
This is how it works
Function test
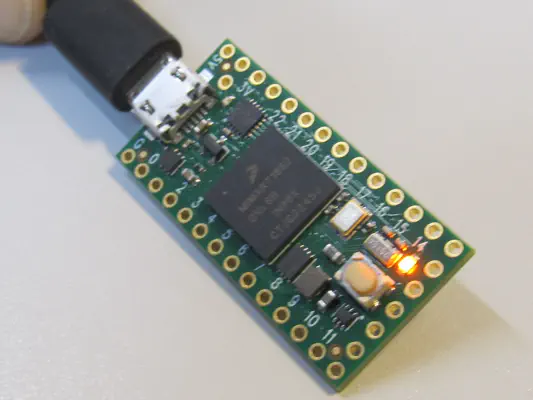
The red LED should flash when powered via USB.
The Teensy should basically work before you start with the customizations. Connect the Teensy developer board to a power source via USB. The red indicator light should flash. Now disconnect the USB cable again.
Disconnect contact for USB power supply
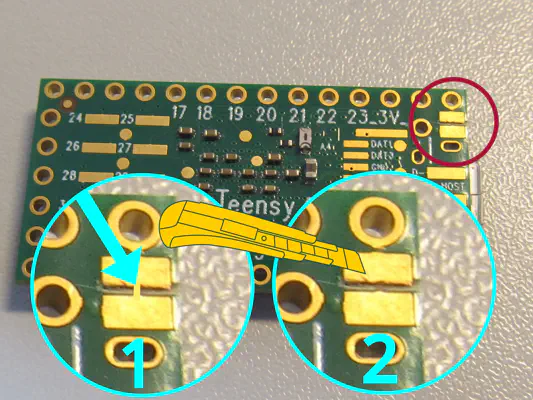
The connection between the two rectangular contacts (circled in red) must be removed. Circle 1 and 2 show how.
The Teensy developer board is to be powered by a battery pack for this project. To ensure that it is not inadvertently supplied with power via battery pack and USB, we must first deactivate the power supply via USB.
In the photo, two square contacts are circled in red. The two traces are connected by a small trace (see arrow in circle 1). You have to scrape this away with the cutter knife until it looks something like in circle 2.
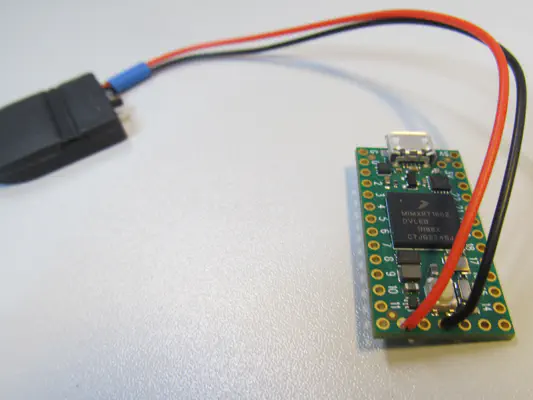
To check, connect the Teensy to a power source via USB again. The red LED from the first step should no longer flash/light up.
Prepare the button cell holder

Button cell holder with shrink tubing over the connection cables
- A button cell also supplies the Teensy with power when it is not connected to the battery. This means it does not lose its time and date settings while you are charging the battery.
- Before you can solder the button cell holder to the Teensy, a small piece of shrink tubing (1 cm) must be pulled over both cables (but not yet heated). This will provide strain relief later.
Please only insert the button cell when you are asked to do so in the instructions. Otherwise there is a risk of short circuits during soldering.
Solder on the button cell holder
Soldered button cell holder